Supplies Needed:

- Shower Drain
- Mesh Screen
- Large Barrel (Ours is 30 Gallon and was found on its way to the dumpster)
- 1-inch Threaded Hose Connector
- Half-Inch Vinyl Hose
- Brass Spigot
- Teflon Tape
Assembly:
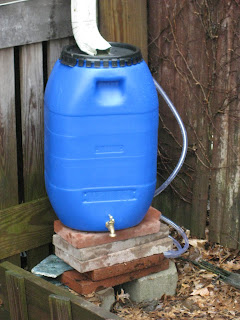
Top: Cut the Mesh Screen to fit the size of the drain. Hold it in place with the screws that hold the grate to the drain assembly. Cut a hole in the lid of a barrell to fit the diameter of the drain assembly. Attach the drain into the lid by tighting down the threaded collor of the drain assembly onto the lid. The rubber gasket should be positioned so that you have a water tight seal.
Overflow Tubing: Drill a one-inch hole into a side of the barrel towards the top. Thread the hose conector through the one-inch hole and attach overflow tubing to the hose connector.
Spigot: Drill a second one inch whole into the side of the barrel towards the bottom. Wrap the threading of the spigget with some teflon tape. Thread the spigot into the one-inch hole, turning until you have a tight fit.
Place the rain barrel under a down spout from your roof. The down spout can be cut to fit the barrel with a hack saw. Additionally we placed it on top of several cinder blocks so we could easily fit our watering can underneath the spigot.
Related Posts: What is hindering your ability to be Green, Get out of the House, Learn New Skills, Help Others and Your Resume Talking Trash
Picture Courtesy of: Jamie
No comments:
Post a Comment